Overclocking is something PC enthusiasts are all too familiar with. By tweaking the power limits and speed of your CPU, you can usually get more performance out of it … just as long as you know what you’re doing to prevent damage. But overclocking is usually only talked about with desktop computers. What if you want to overclock your laptop’s CPU?
Well, it’s kind of possible. Even the best laptops aren’t made for overclocking, and the vast majority of laptop CPUs don’t support overclocking at all. Even if some CPUs do support it, some laptop models may be locked down in other ways, so the number of laptops that can be overclocked is extremely limited. Basically, if you don’t have an HX- or HK-series CPU, you can forget about overclocking, and even then, you’ll have to check your specific model.
Warning: Even if your laptop supports CPU overclocking, the process of overclocking is risky. Overclocking can result in higher temperatures, and laptops have far more restrained cooling capabilities compared to a desktop. Overclocking may cause instability or permanently damage your laptop due to heat. Ensure you have optimal airflow and cooling before trying this.
Step 1: Test the performance and temperature of your CPU
Before you start overclocking, you’ll need to determine how stable your CPU is and how hot it gets. Running a stress test like Prime95 or Aida64 is a great way to test stability, since it constantly pushes your CPU to 100% usage. Let it run for at least 30 minutes (longer is better) to make sure your PC is stable in these conditions. It’s also a good idea to run a benchmark like Cinebench and write down the score.
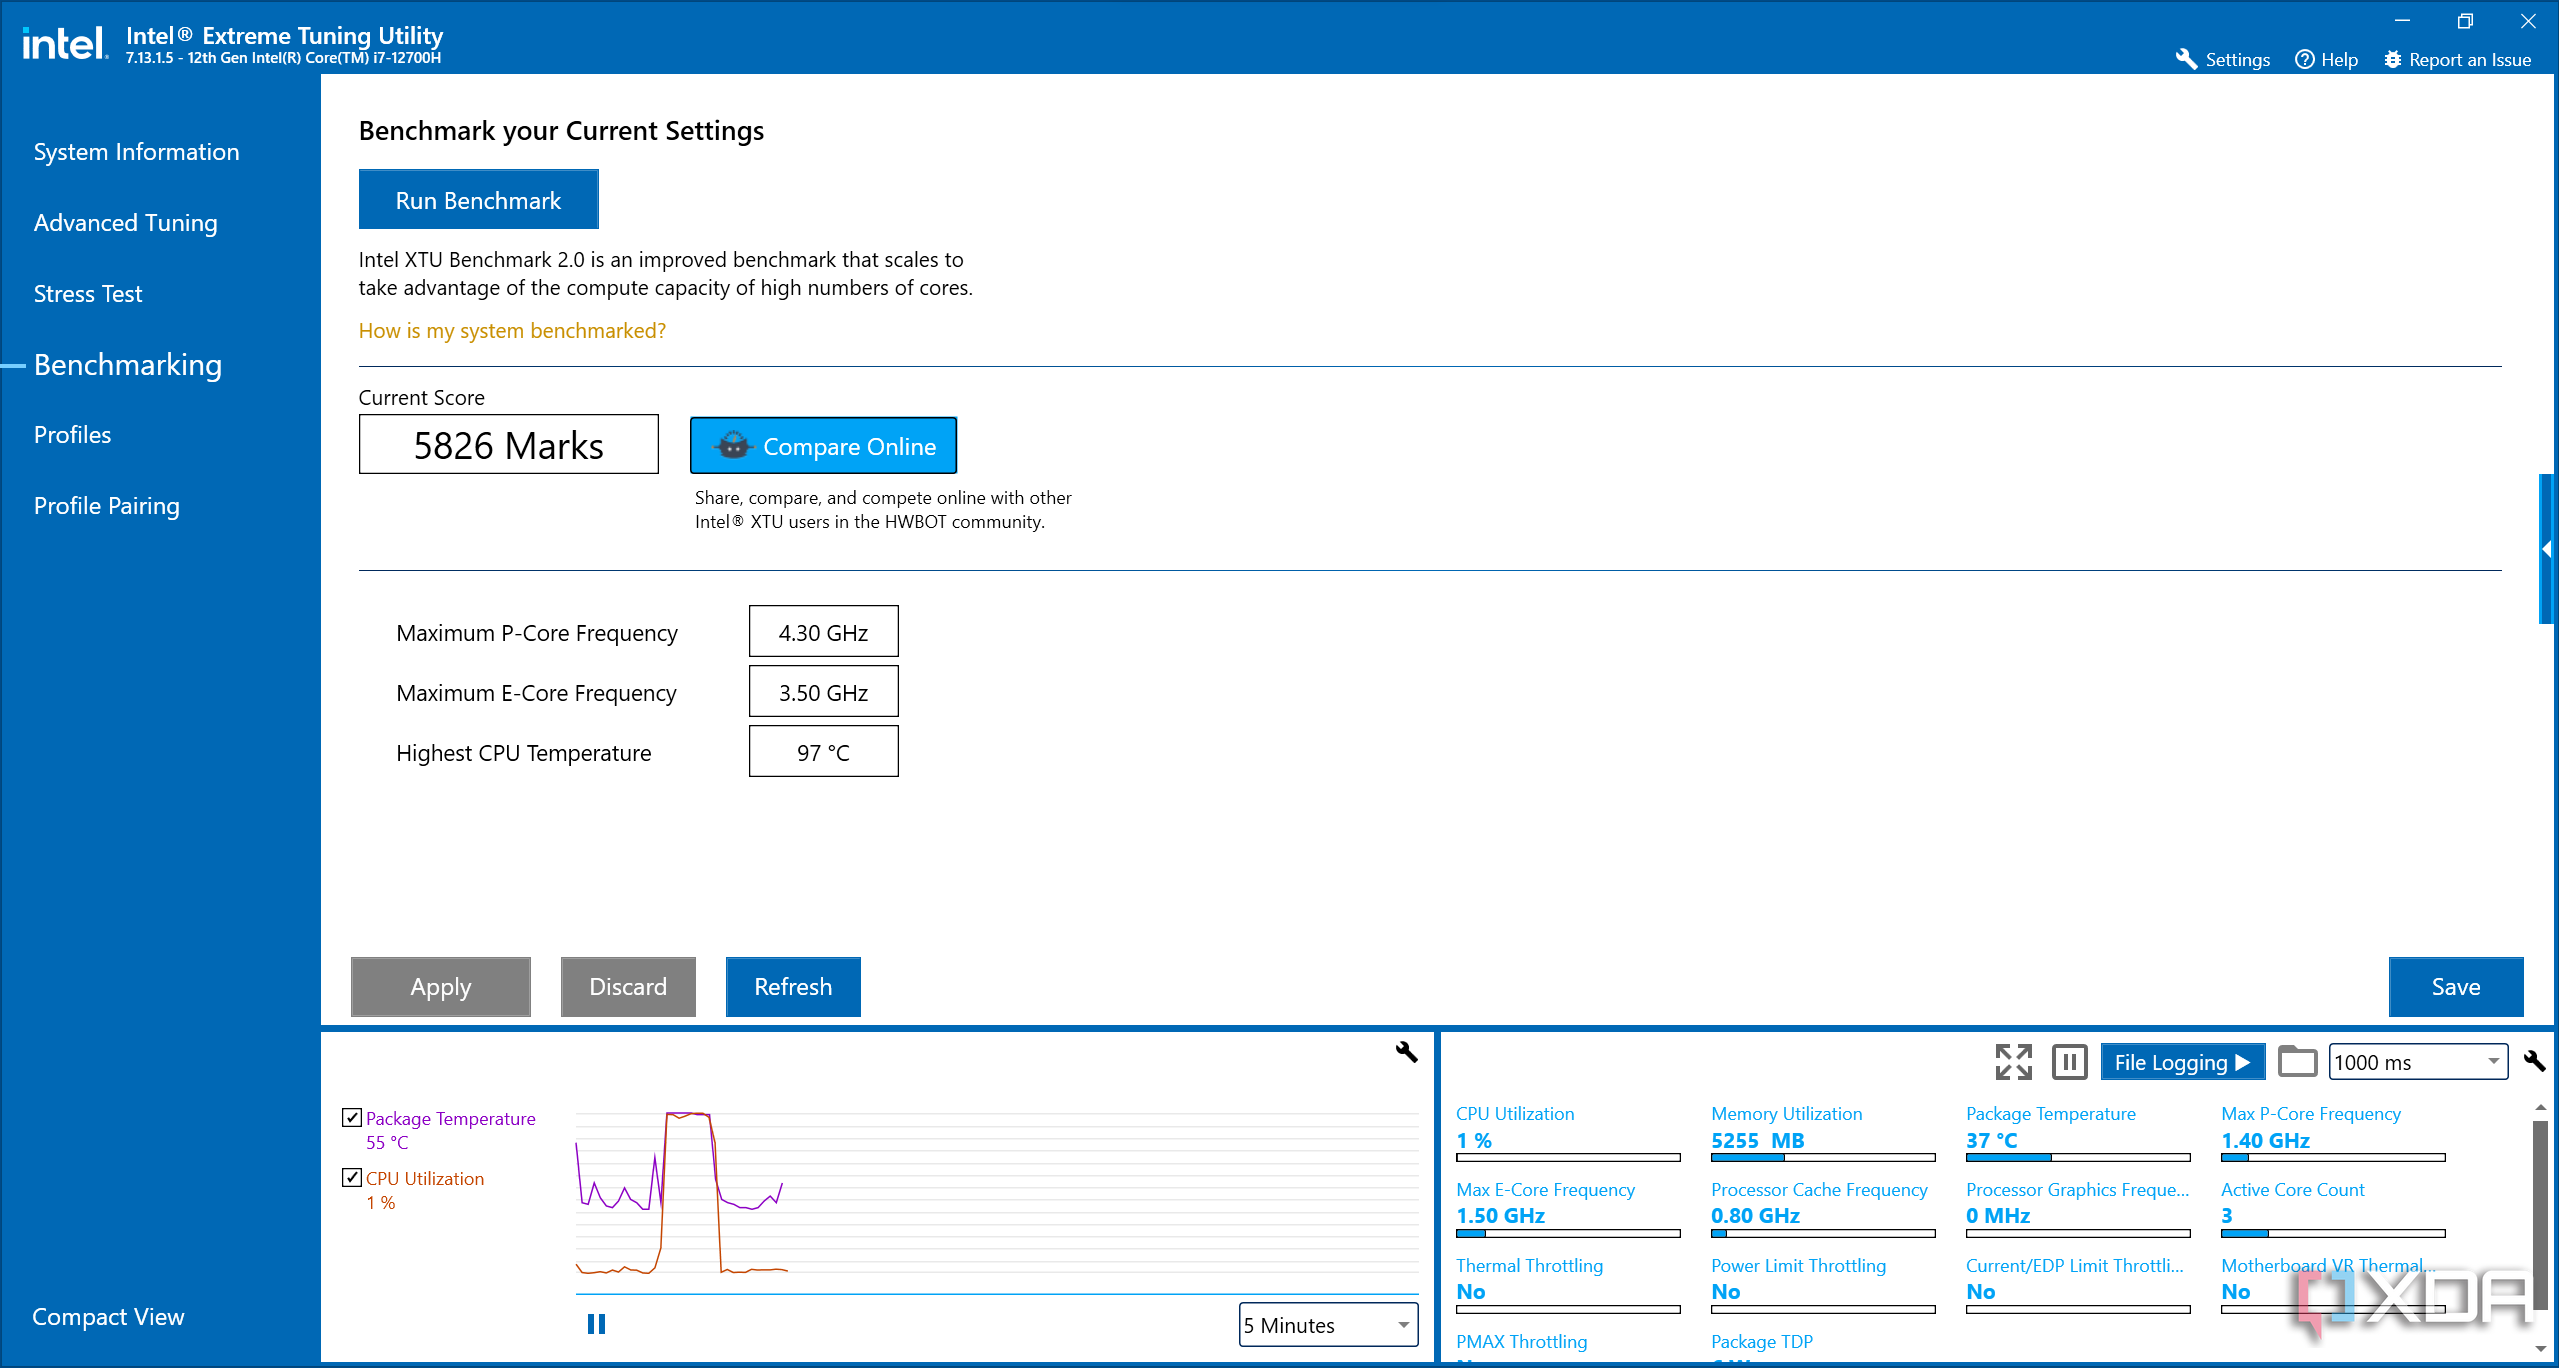
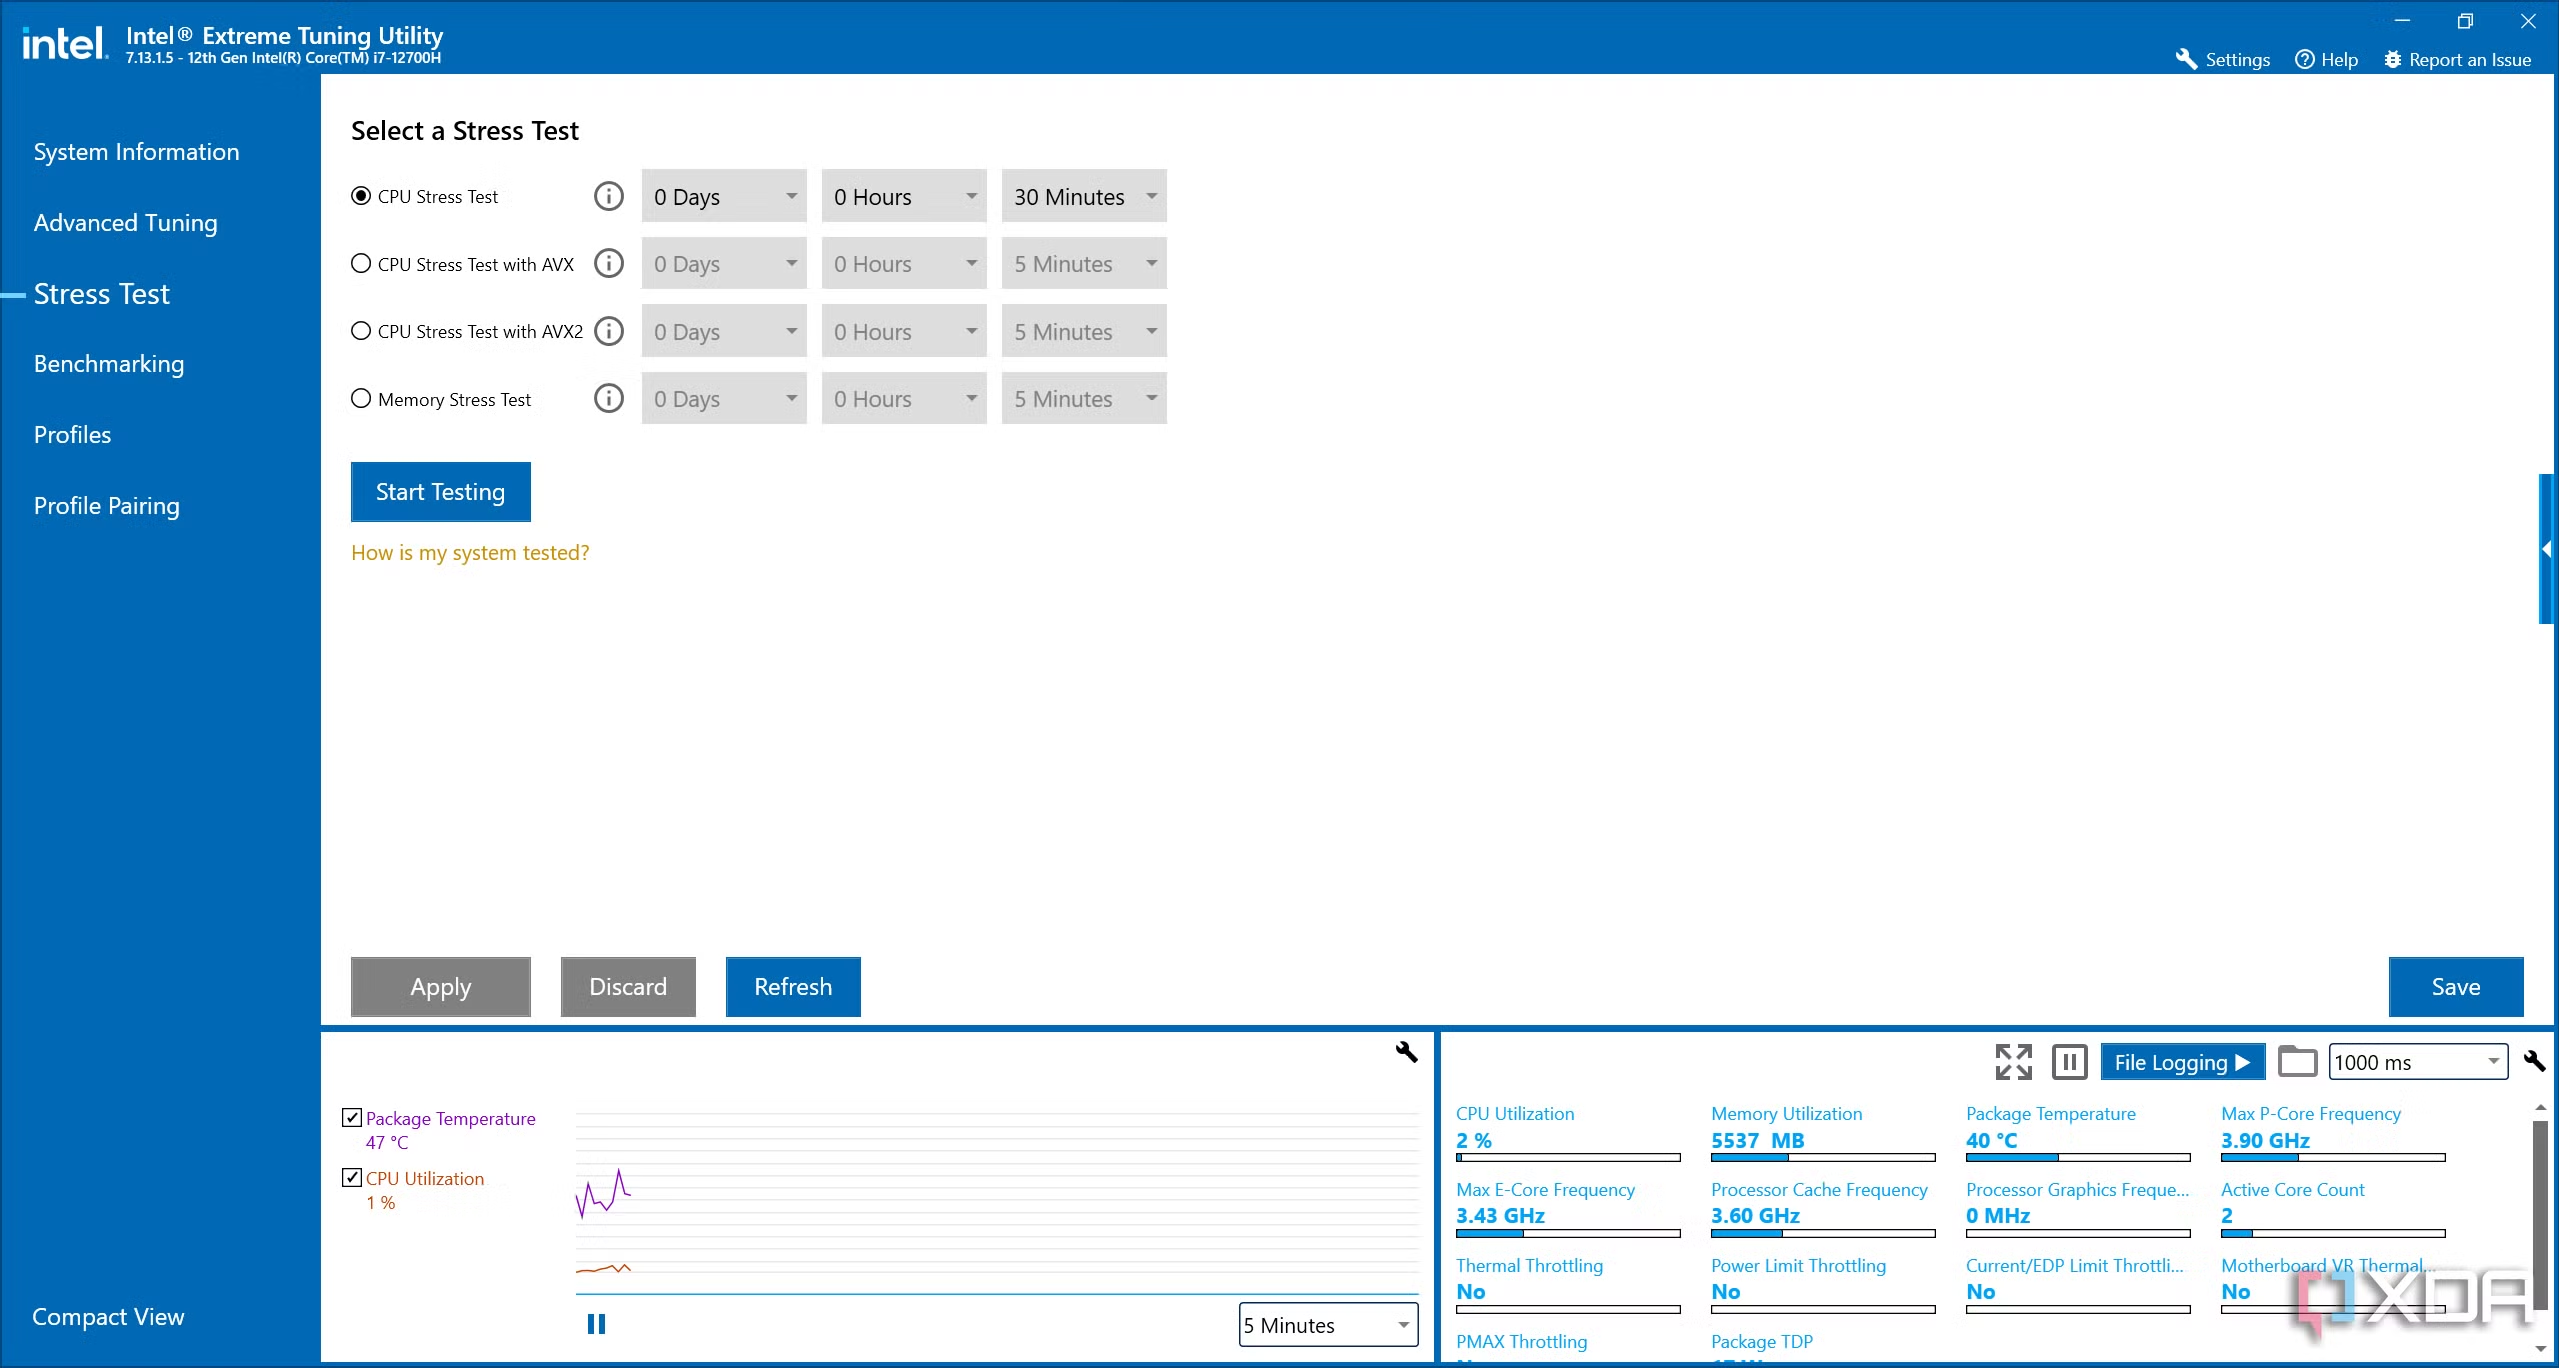
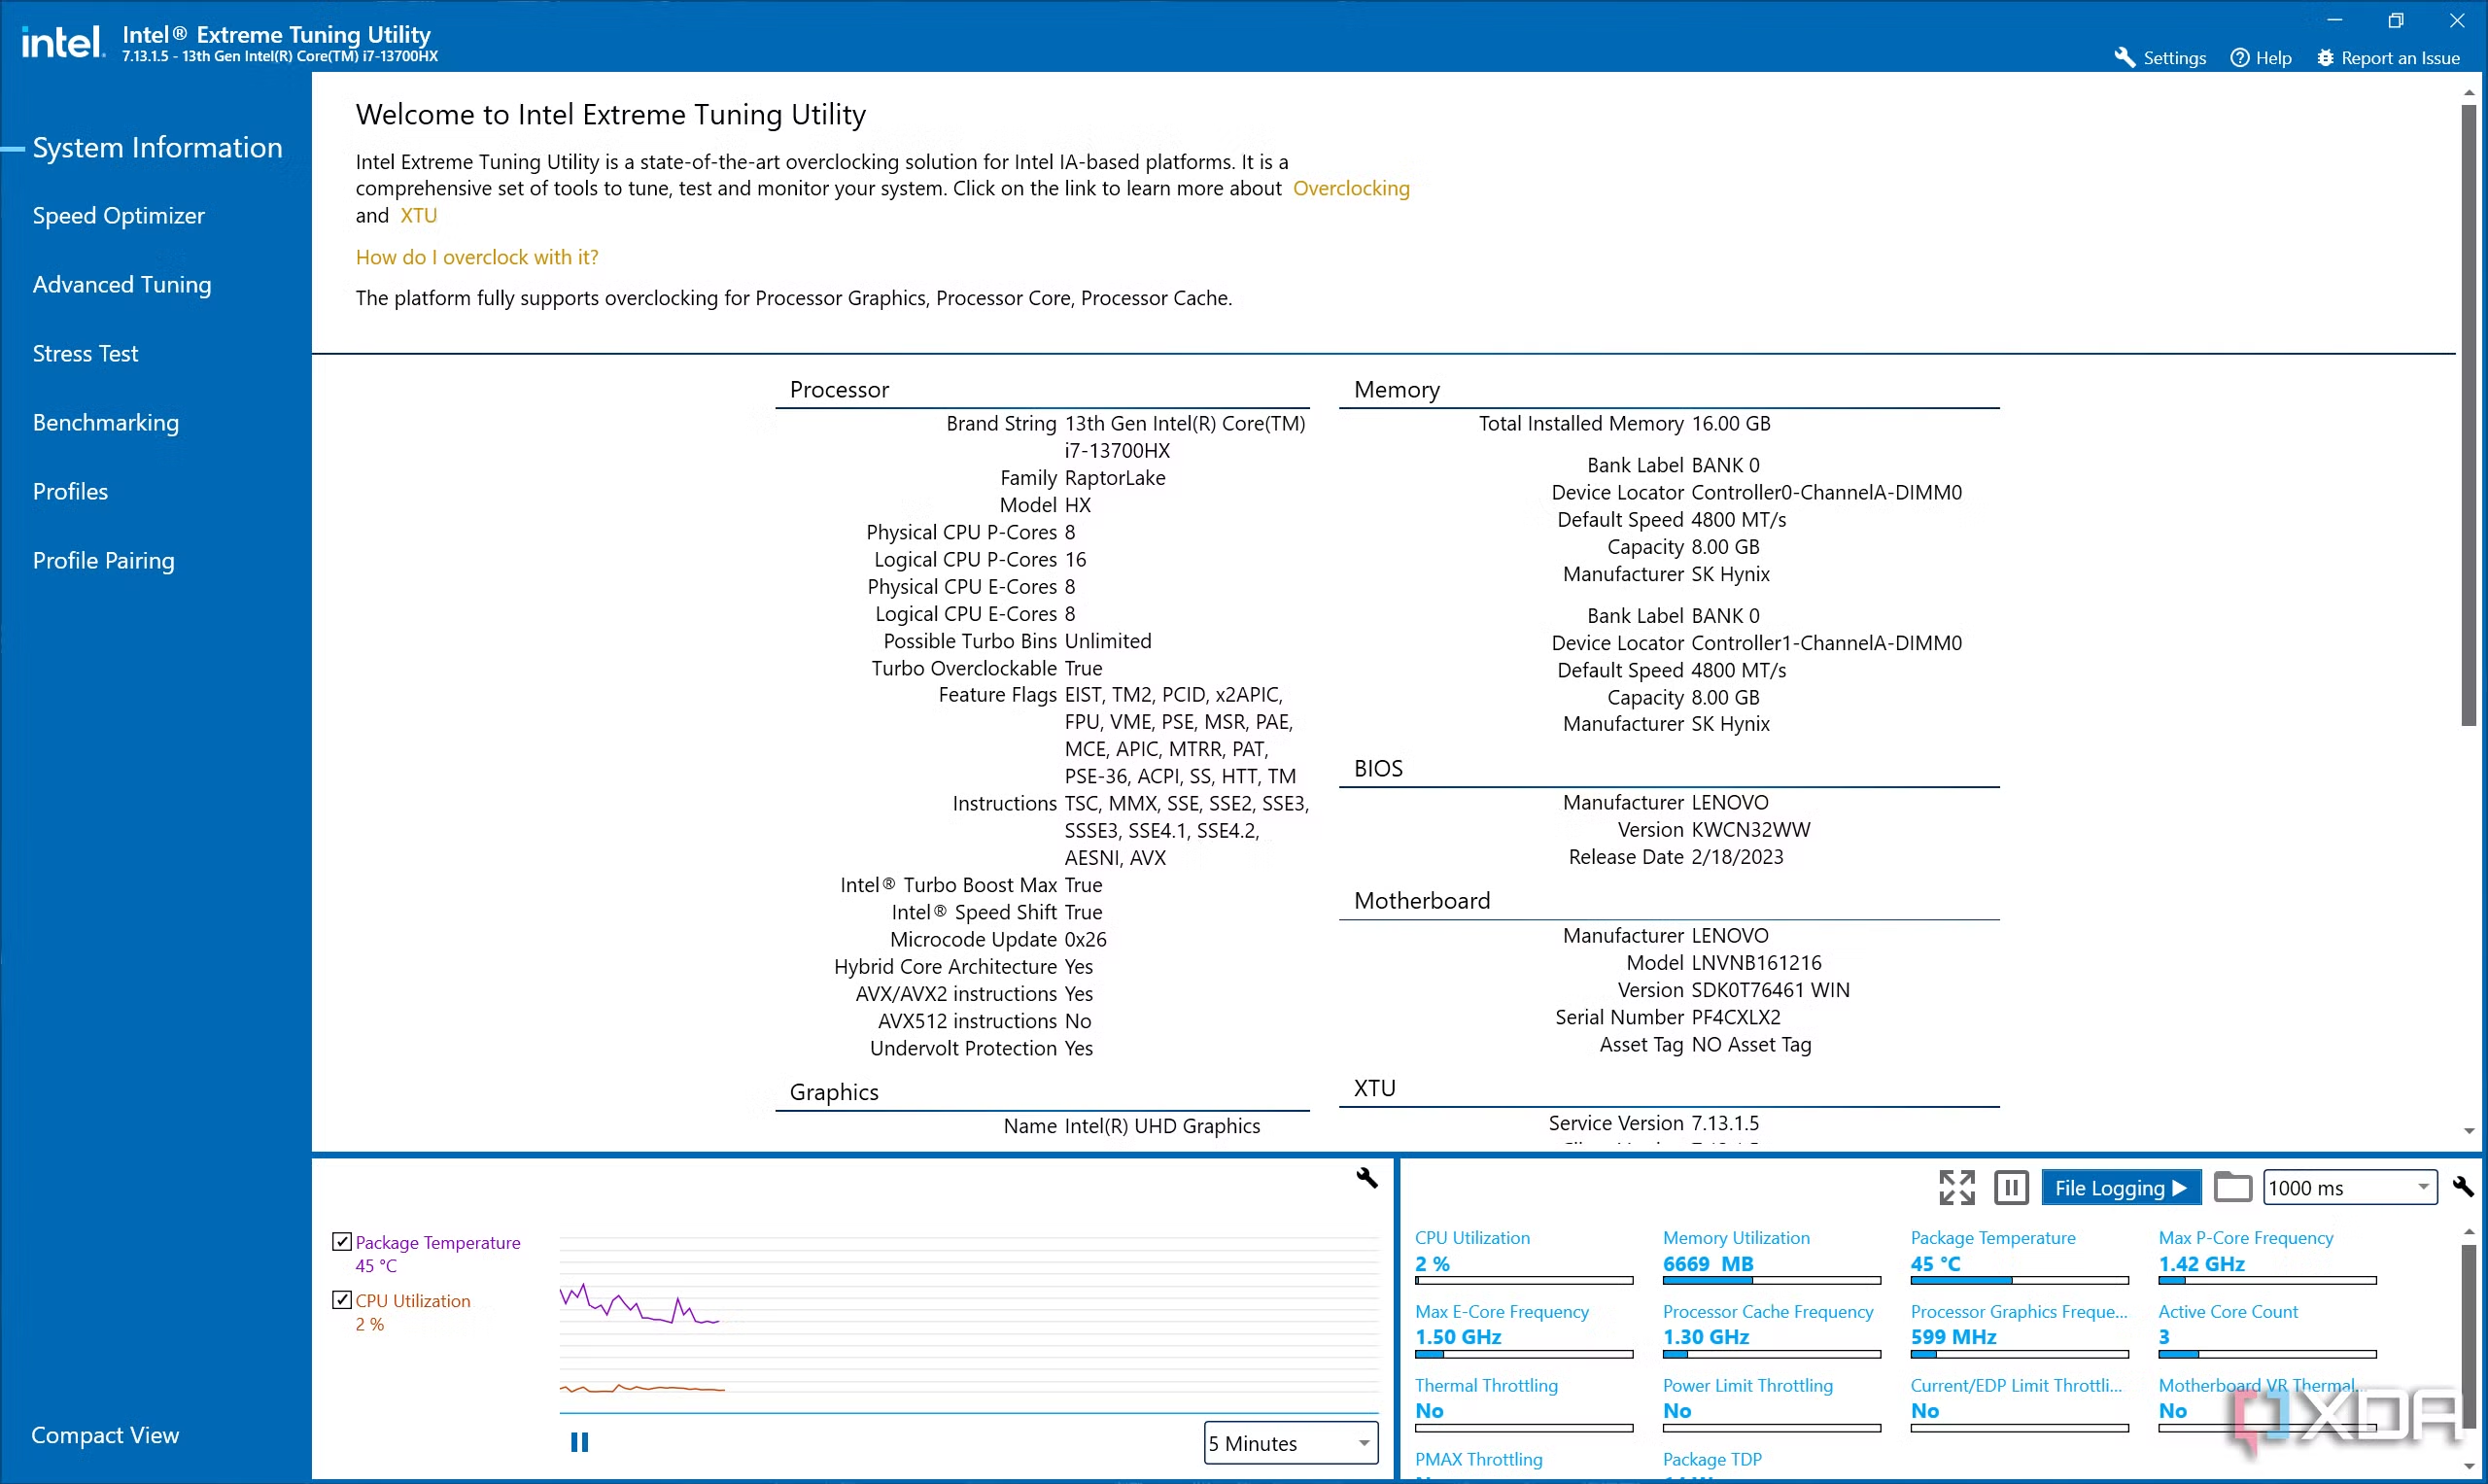
Intel Extreme Tuning Utility is another great tool for this if your laptop has an Intel processor. It has both a built-in benchmark and stress test, so you can do these tests before and after overclocking. Write down the score, core voltage, and temperature of your CPU during the test so you have the baseline numbers before you start overclocking. This lets you compare the performance after the overclock so you can see your gains.
Note: Typically, if your CPU temperature exceeds 80 degrees Celsius during these tests, it’s best not to move forward with overclocking unless you can improve cooling in some way. Excessive heat can damage your laptop or cause it to shut down to protect its internal hardware.
Step 2: Overclocking the CPU
Assuming your laptop supports overclocking, the procedure is generally similar to how it works on a desktop. If your laptop’s BIOS has built-in overclocking, you can change the settings there, but these settings may vary depending on the manufacturer; they may not be available at all, even if your CPU supports overclocking.
The easiest way to overclock your CPU is to use the Intel Extreme Tuning Utility (XTU) or AMD Ryzen Master, though AMD’s laptop processors are not compatible with Ryzen Master, even those in the HX series. As such, we’ll be focusing on Intel Extreme Tuning Utility, though the principles are the same for any CPU. You can use third-party apps like Ryzen Controller for overclocking AMD laptops.
Basic overclocking
When you launch the Intel Extreme Tuning Utility, you’ll be greeted by the basic view, which is all most people should mess with to get more performance. First off, you’ll want to click Run Benchmark to test your PC.
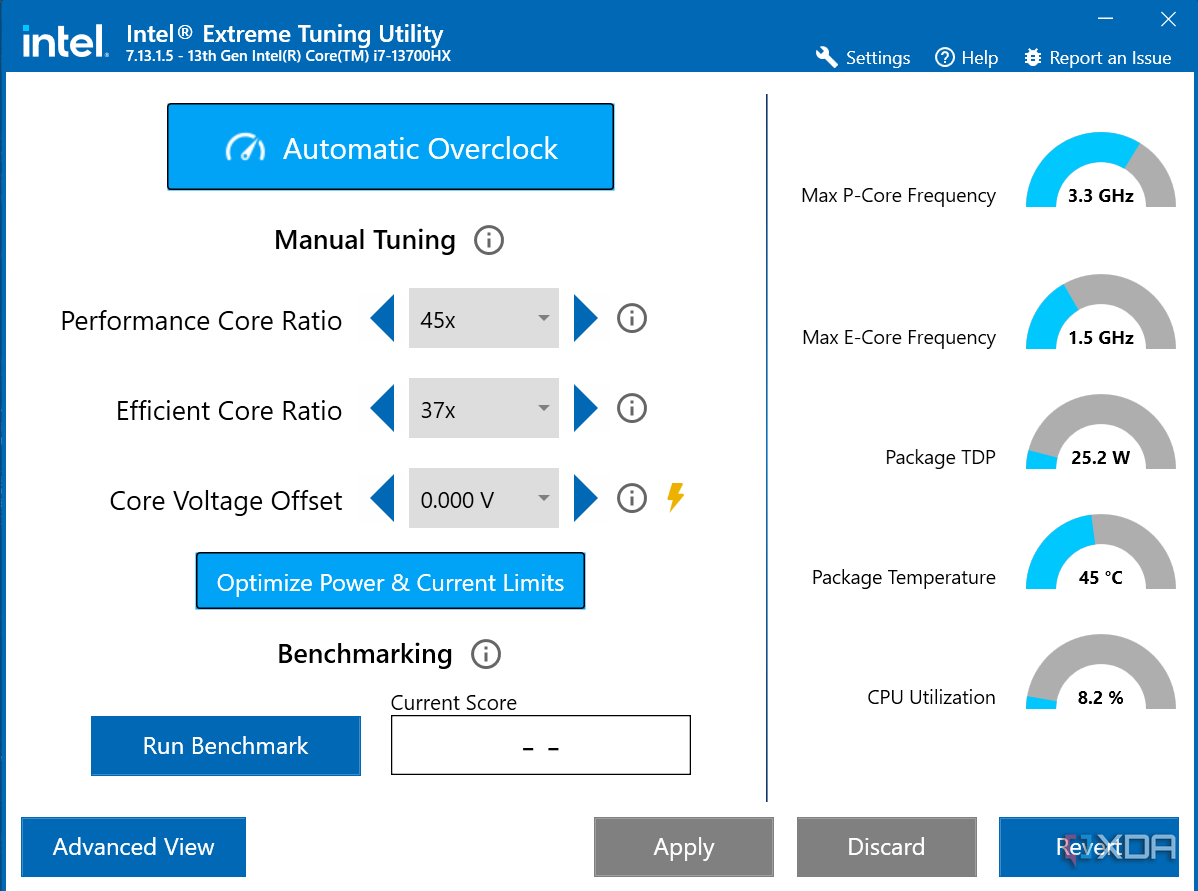
Once you know the baseline performance of your laptop, the easiest way to get a boost is the Automatic overclock option, which automatically determines the best stable setting for your CPU so you can get better performance without much risk. If you want to get into manual tuning, though, you’ll notice three elements here:
- Performance Core Ratio: Indicates the core multiplier for performance cores, which is multiplied by 100Mhz to determine the CPU’s clock speed.
- Efficient Core Ratio: Indicates the core multiplier for efficient cores (also multiplied by 100MHz)
- Core voltage offset: Indicates changes to the core voltage, which determines power consumption.
In order to overclock the CPU, follow these steps:
- Increase the Performance Core Ratio by 1 (equivalent to 100Mhz).
- Run the benchmark to test performance and stability.
- If your system is still stable, try increasing the Performance Core Ratio again, always in increments of 1, and testing it each time.
- Once you start noticing stability issues, increase the core voltage offset by 0.005V.
- Run the benchmark again to see if the laptop is stable.
- If not, revert to a lower Performance Core Ratio.
- You can also do this for the Efficient Core Ratio, using the same careful testing.
You can repeat these steps until you have a level of performance you’re happy with, but you can’t increase the voltage and clock speed indefinitely. Higher voltages mean more power consumption and more heat, plus a higher risk of damage to the components. Monitor the temperature to ensure your laptop isn’t overheating and don’t push the values too high. Run the built-in stress test or something like Prime95 or Aida64 for at least 30 minutes to ensure your final configuration is completely stable.
Advanced overclocking
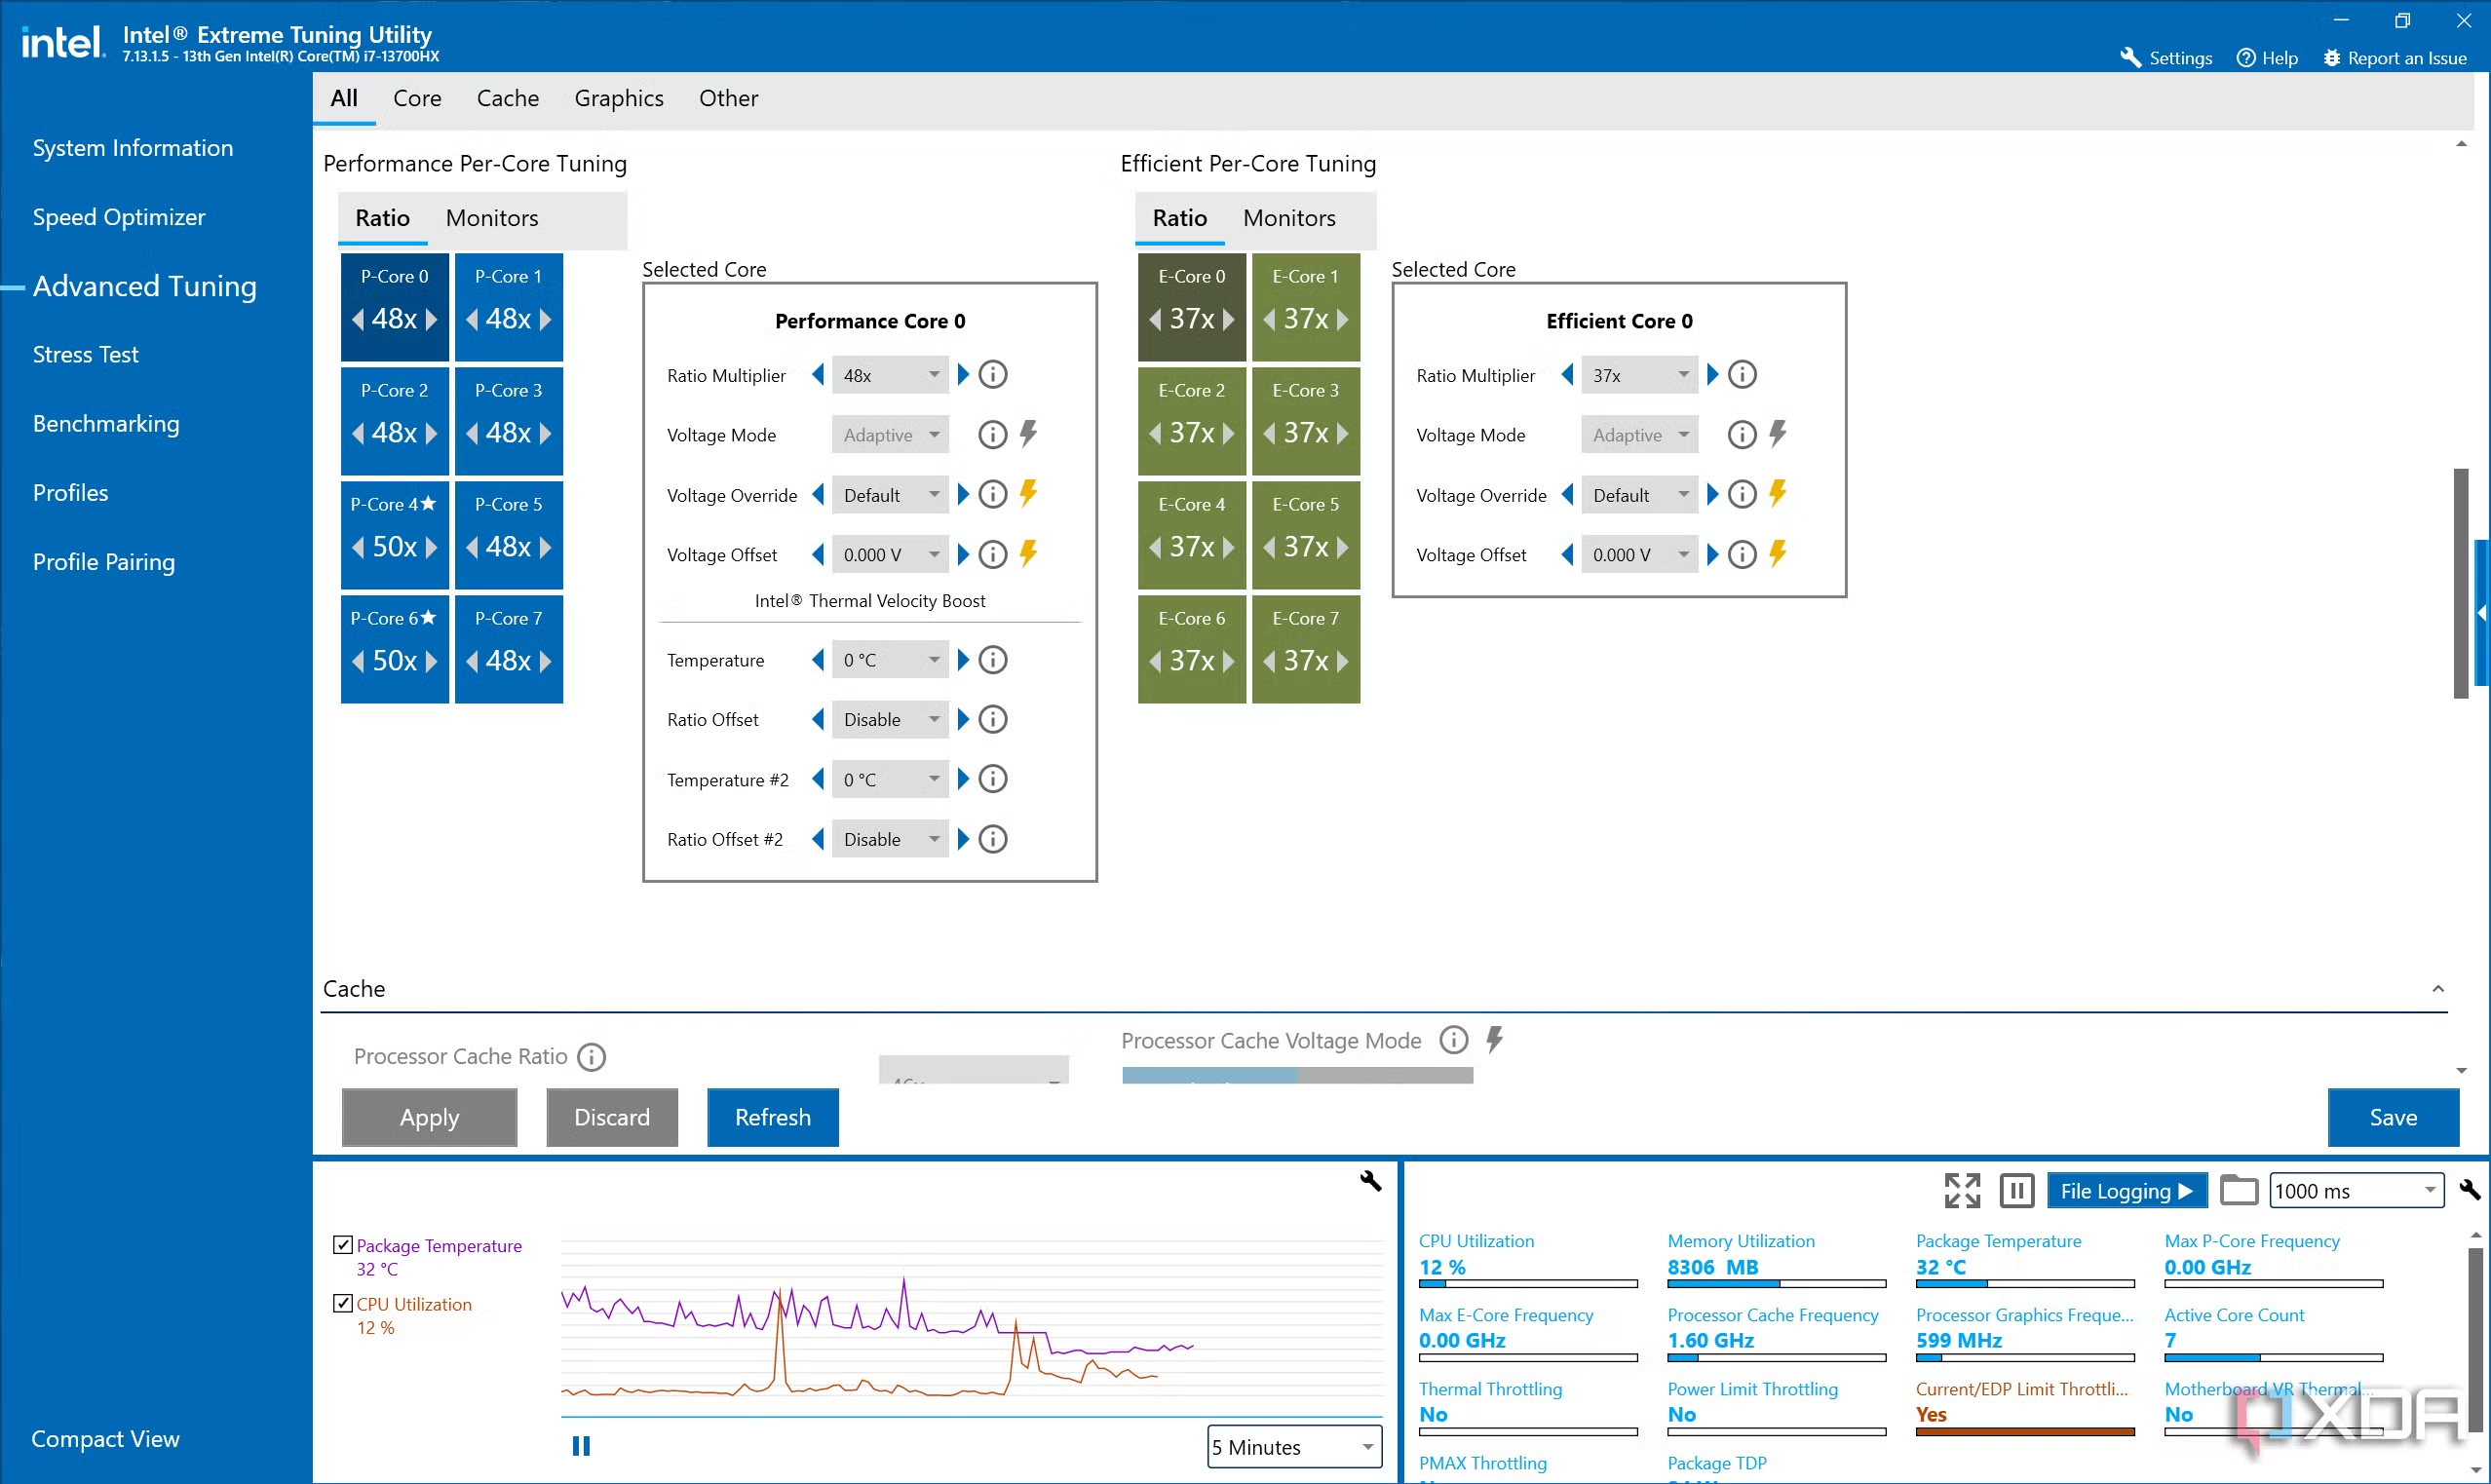
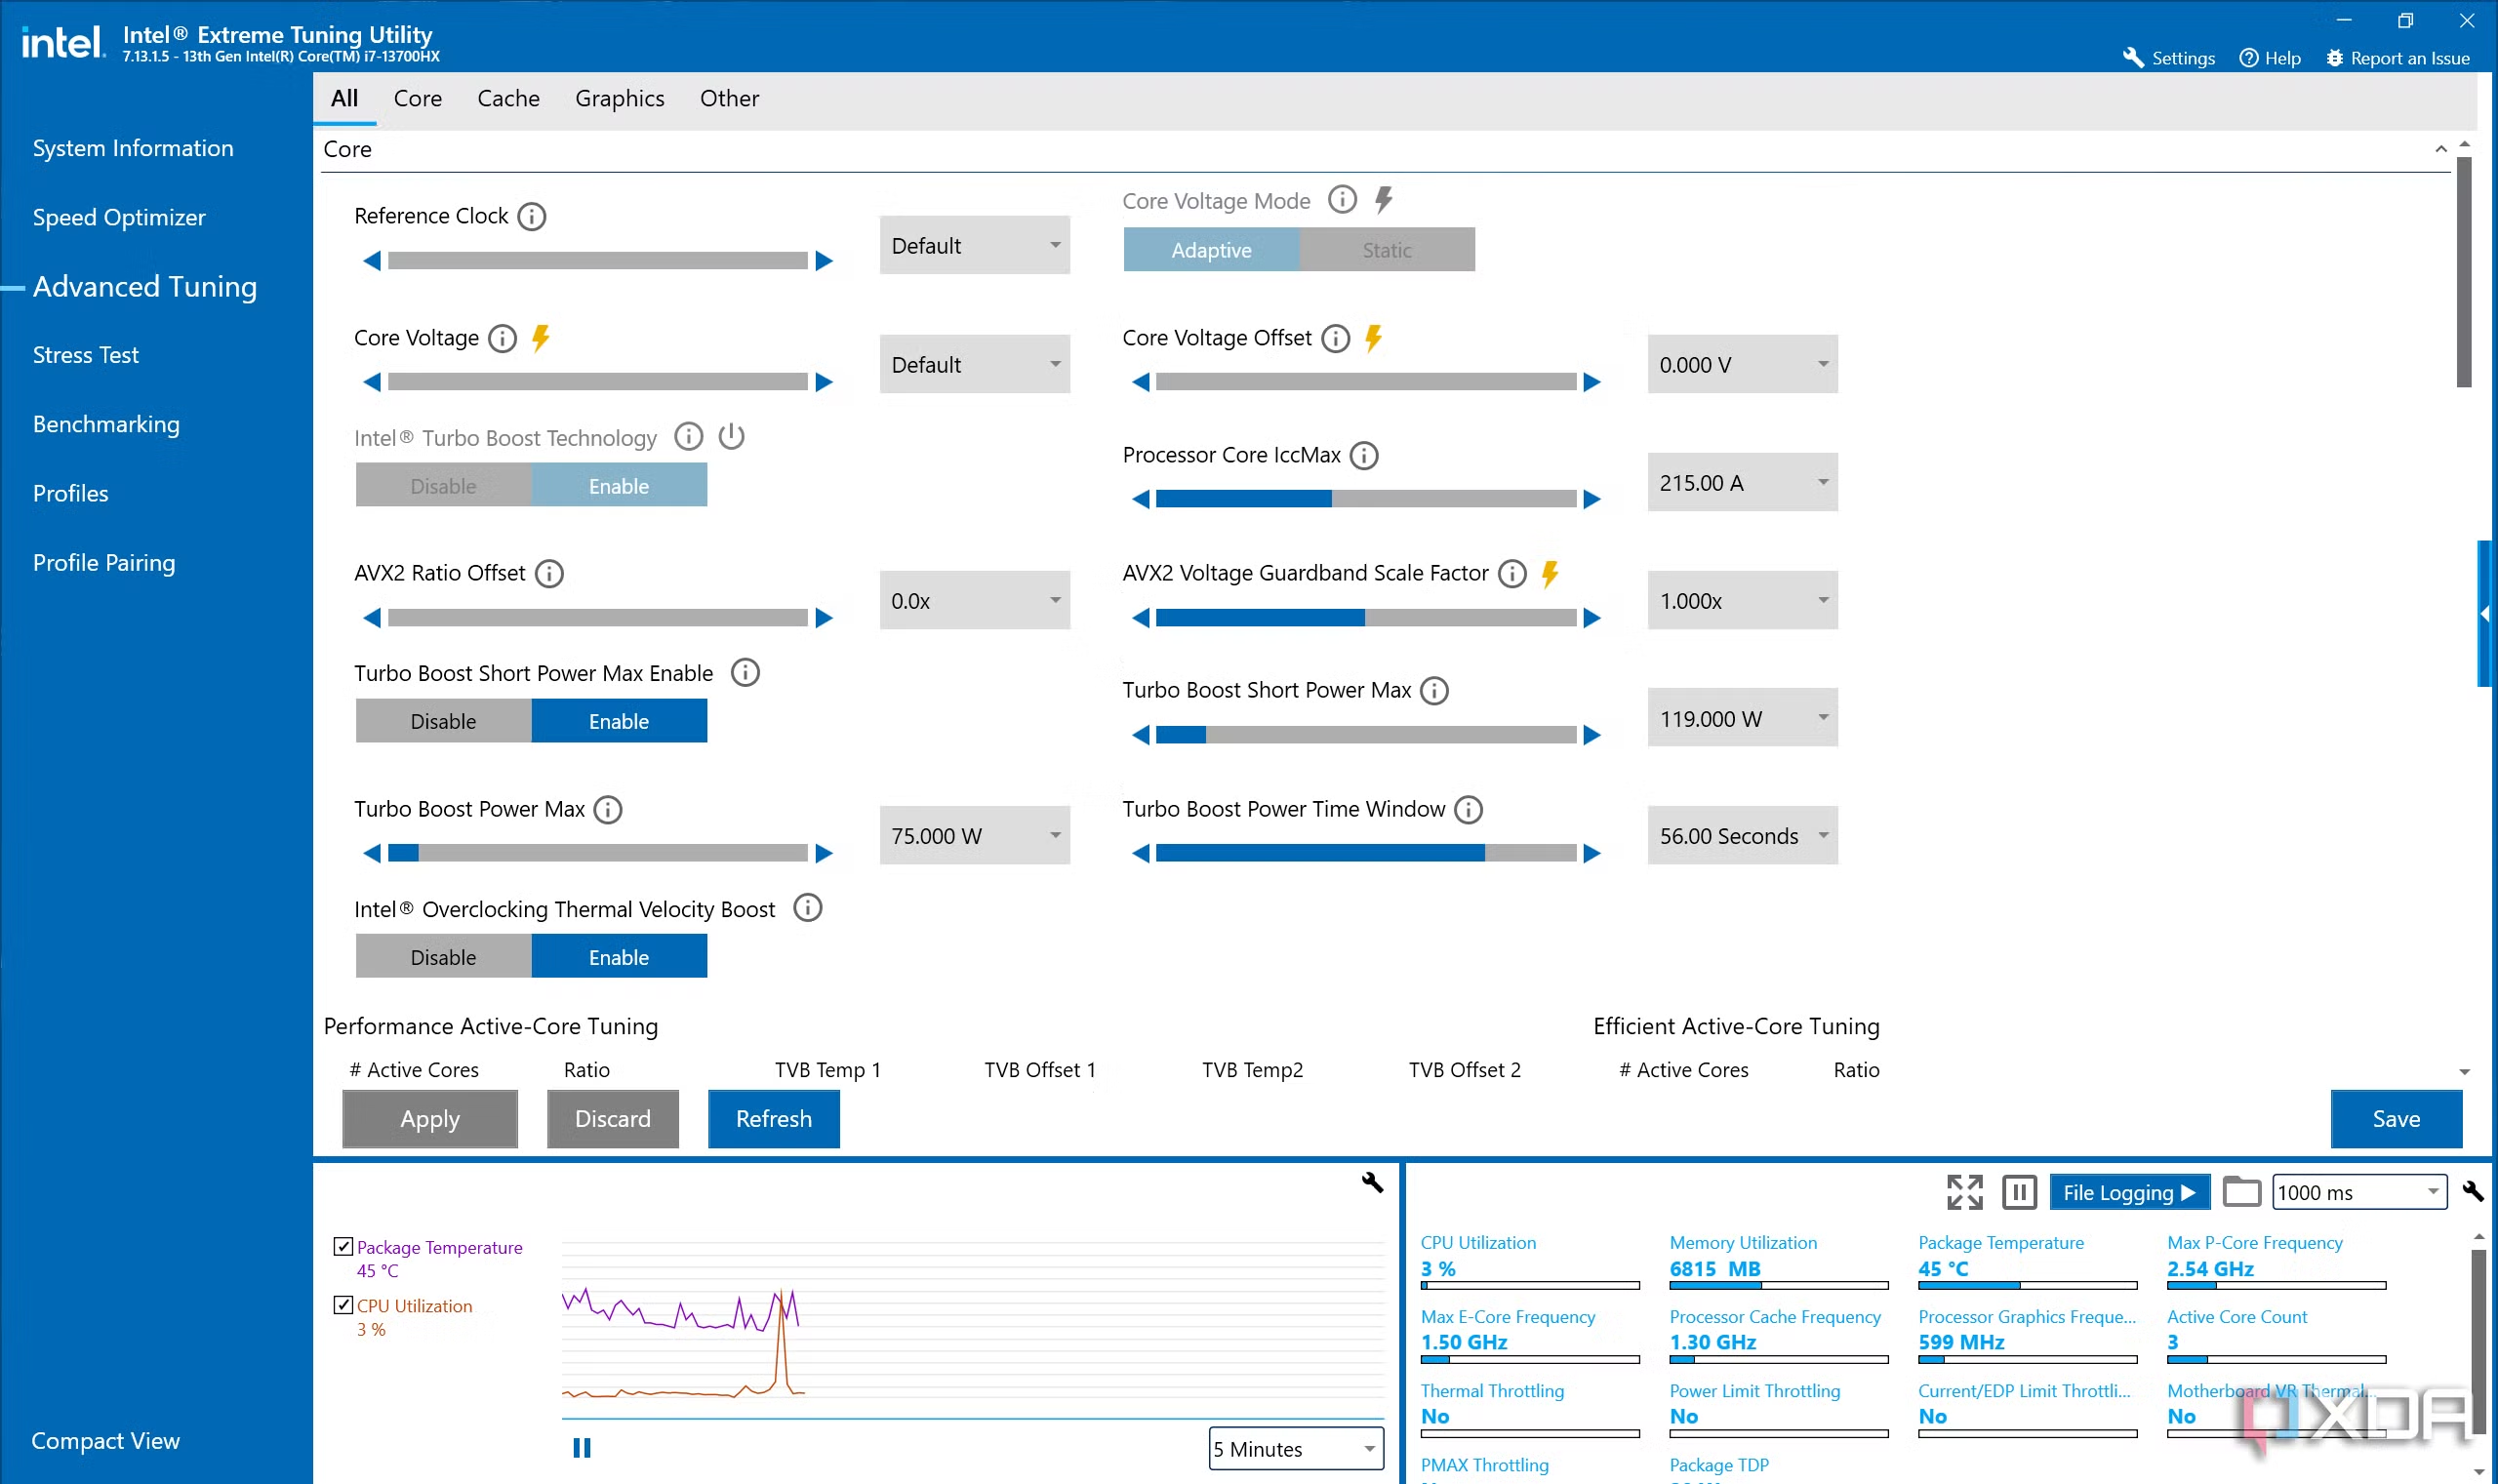
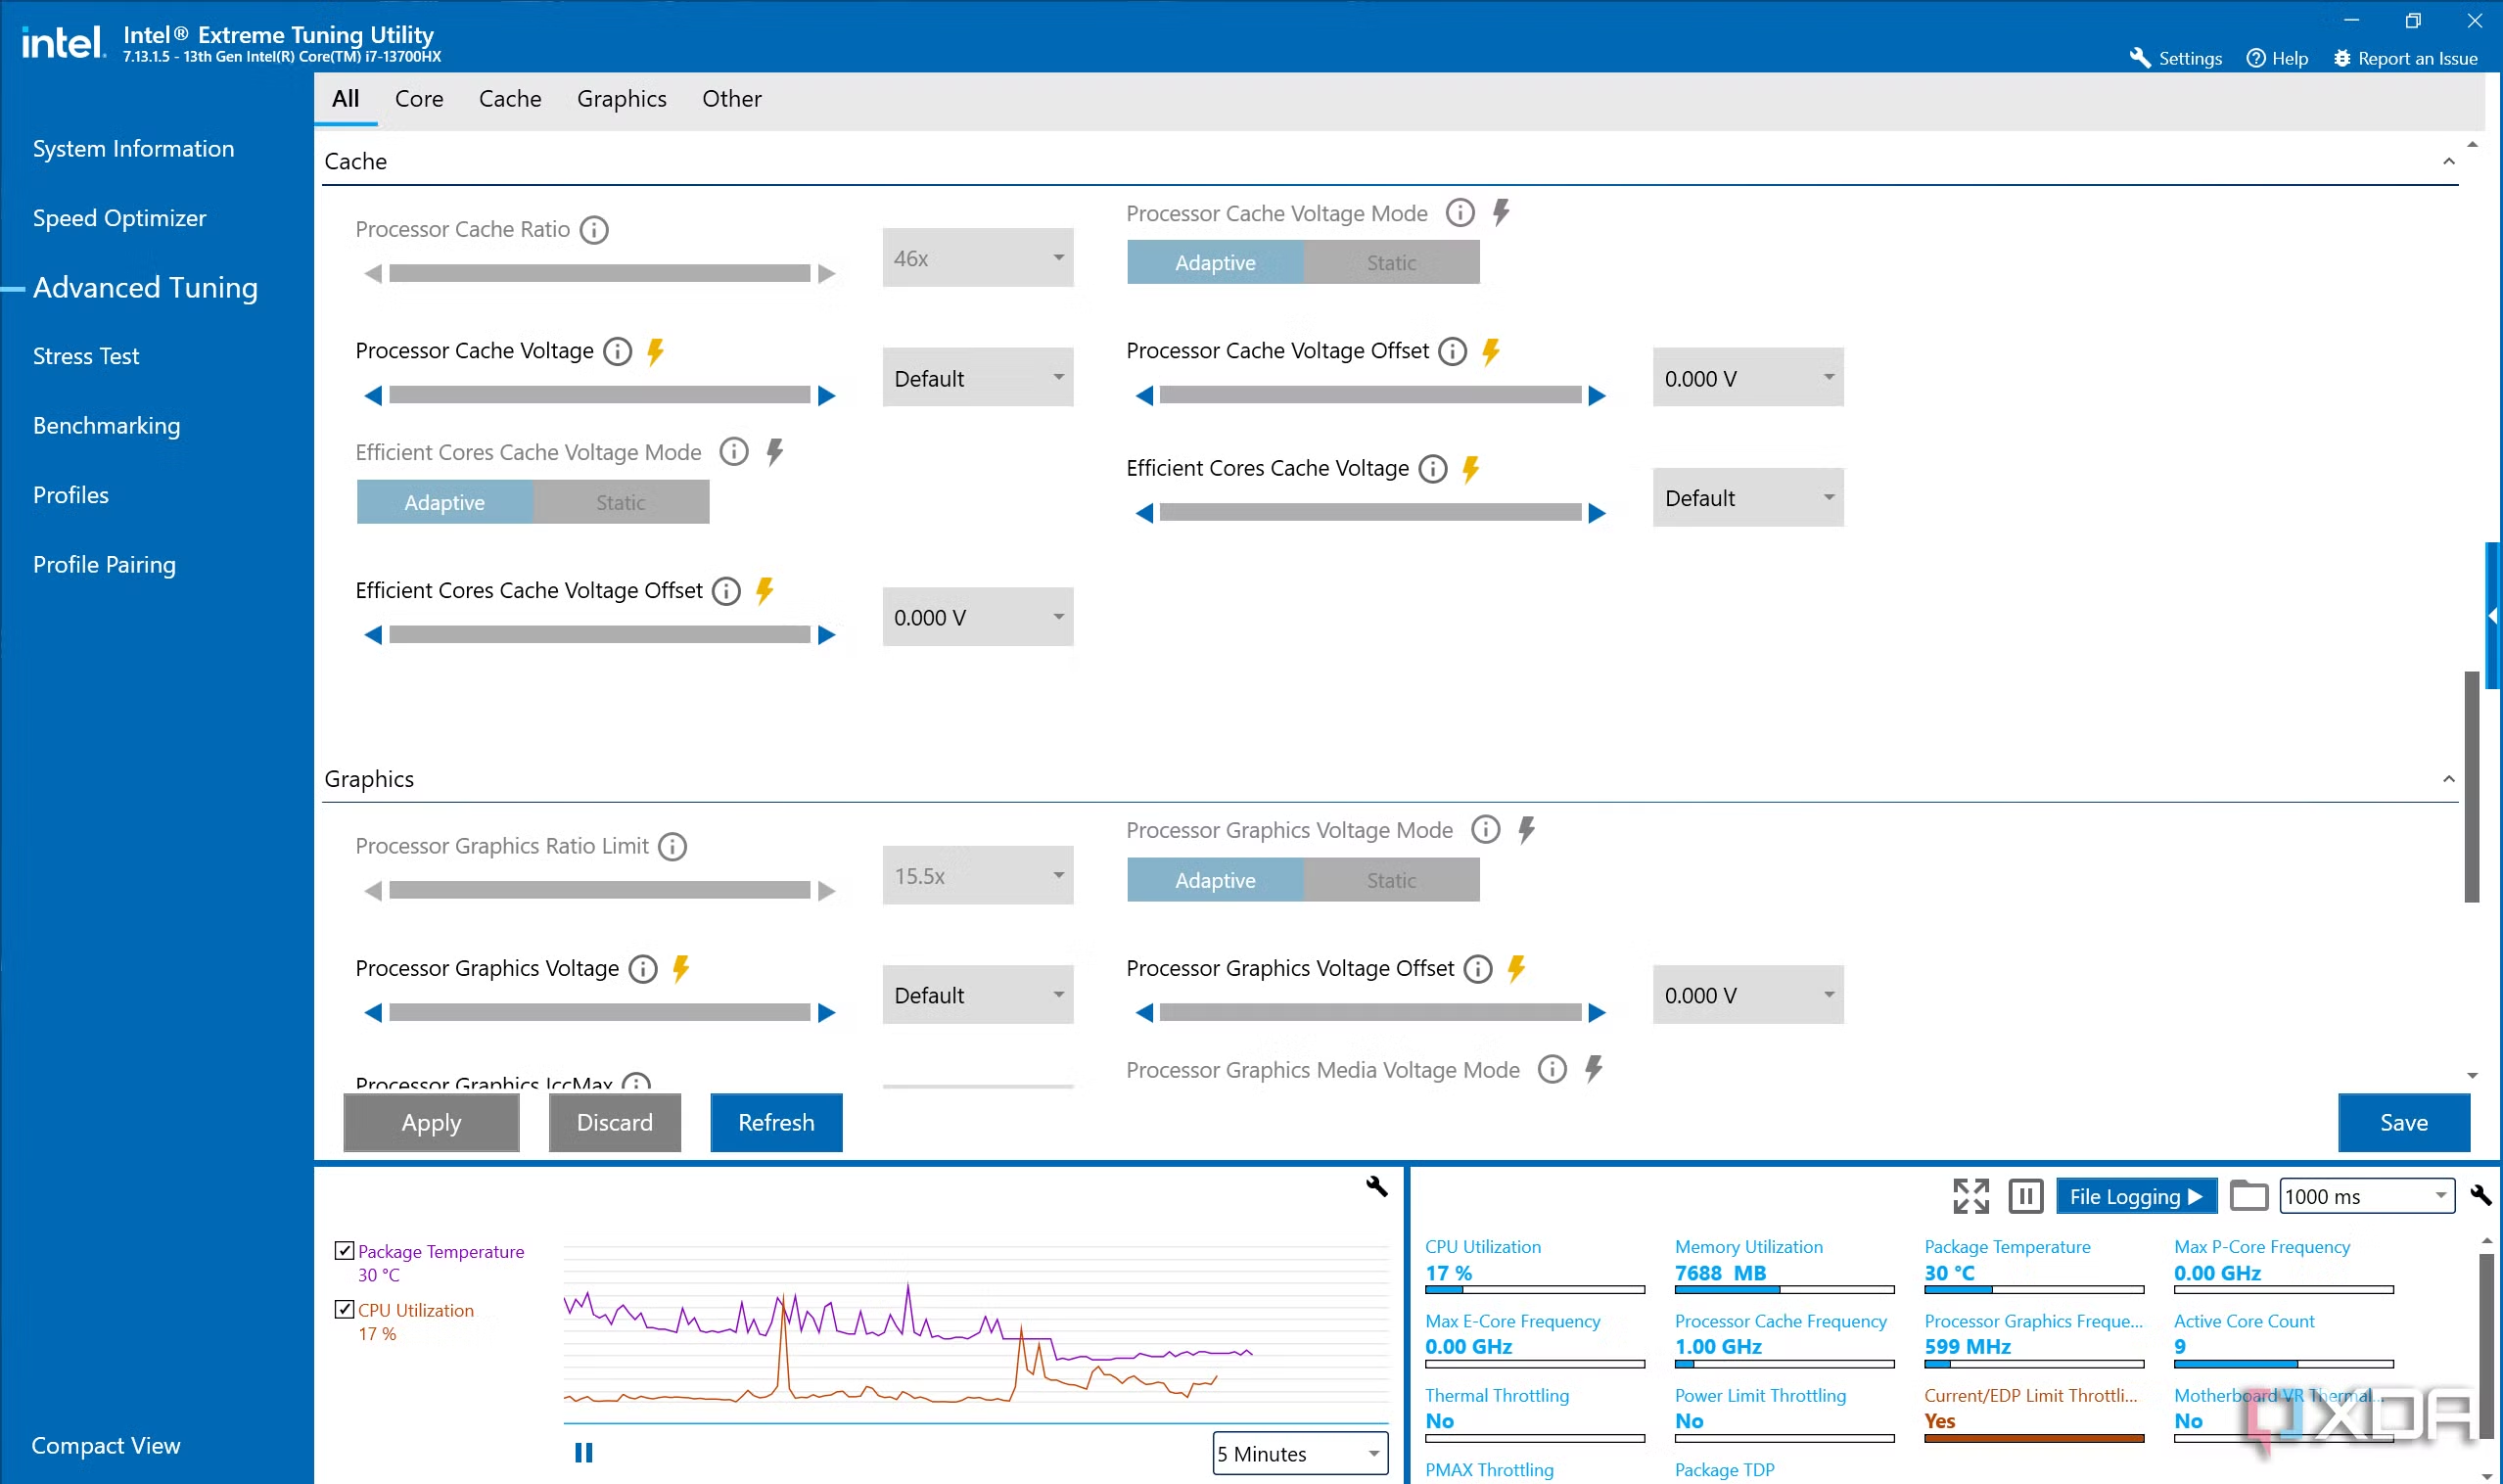
If you want to get into the nitty-gritty, you can click Advanced view in Intel Extreme Tuning Utility and then choose Advanced Tuning from the side menu to change even more settings. Messing with some of these settings is already risky on a desktop, so we really don’t recommend going too deep into it unless you’re absolutely sure of what you’re doing.
The advanced tuning view lets you change the Core voltage offset in much the same way as the basic tuning, but you can tune the core ratio for performance cores and efficient cores in a more granular way. Instead of just a base level for each kind of core, you can adjust the core multiplier based on the number of active cores.
Some other settings you can look into changing here include:
- Turbo Boost Short Power Max: Determines the peak amount of power the CPU can use for short-burst tasks.
- Turbo Boost Power Max: Determines the peak amount of power for a regular Turbo Boost.
- Turbo Boost Power Time Window: Determines how long the CPU can run at Turbo Boost power, if cooling allows for it.
- Processor cache ratio: Adjust the speed of the CPU cache. It should be tweaked similarly to the core ratio.
No matter what changes you make, it’s important to do it in a granular way and run benchmarks and stress tests each time you make changes to ensure the system is still stable. We really don’t recommend tackling this level of tuning unless you’re a PC hardware veteran, and even then there’s a risk of damaging your laptop in a drastic way.
Boosting performance with software tools
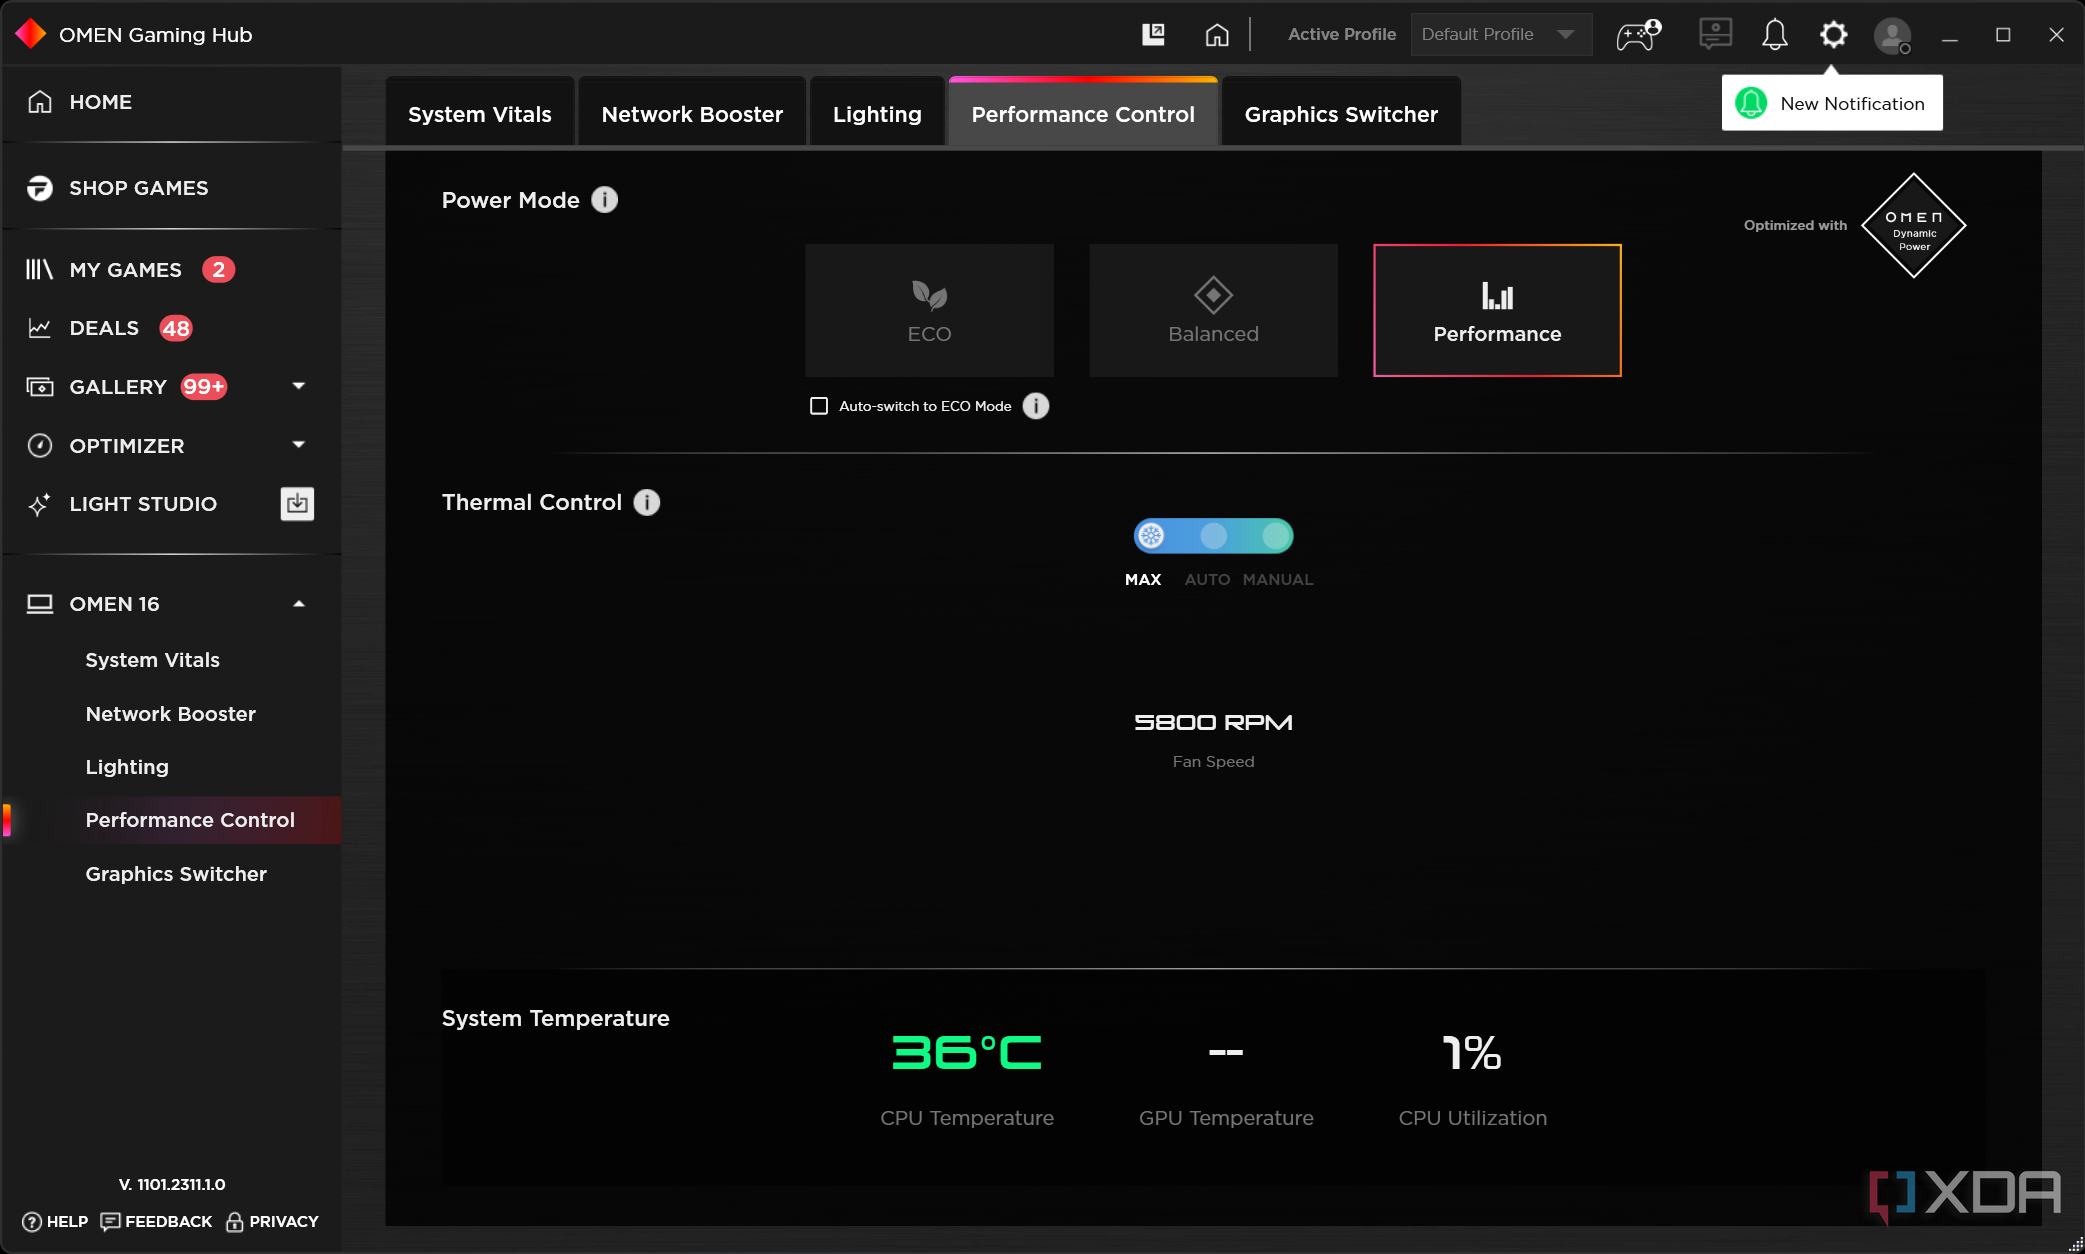
While traditional overclocking is extremely limited in laptops, many gaming laptops offer performance boost options that can easily grant you more performance without the risks of overclocking. For example, HP’s Omen laptops come with the Omen Gaming Hub and Lenovo’s Legion laptops come with the Vantage for Gaming app, both of which include performance tuning.
Here, you can set the power mode and change the thermal behavior. Setting these to Performance and Max, respectively, can result in faster performance, and it doesn’t come with the risk of damaging your laptop. Lenovo’s Legion and LOQ laptops have a turbo mode you can easily enable by pressing Fn + Q on your keyboard. Some other laptops may also have a dedicated turbo button to do something similar.
This is a much easier way to get more performance out of powerful laptops, and it’s much more widely accessible. Overclocking a laptop is possible, but very few machines actually support it, plus it’s a risky affair. If you plan on overclocking, getting a high-end desktop PC is your best bet, since you have a wider range of tuning capabilities and more ways to improve cooling.
original article: https://www.xda-developers.com/how-overclock-laptop-cpu/